Valheim Swamp Guide: Crypts and First Iron
Scope: Vanilla standard survival; world modifiers, mods and later patches may change the rules
Language: English中文
Key points
- Define a first trip as “find a crypt and bring a load home safely”, not as clearing the biome.
- Carry finished, fermented poison resistance mead rather than the base brew, plus the Swamp Key, food, repairs and a way home.
- Muddy scrap piles in Sunken Crypts yield iron scrap; secure an exit before you open every door.
- Under standard portal restrictions iron needs its own transport plan — stockpile at a staging point, then run one dedicated voyage.
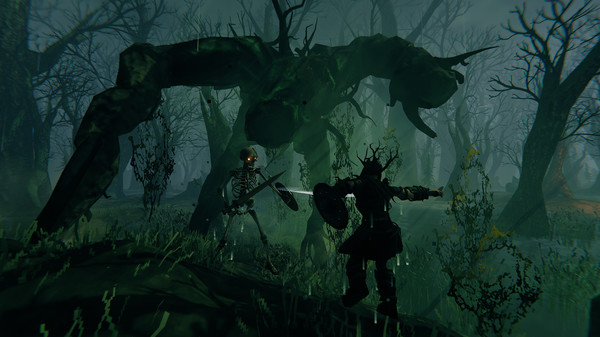
For your first Swamp trip, define success as "find a crypt and bring a load of materials home safely" — not finding the boss, filling the ship and killing everything at once. Poison, standing water and dense threats stack up here, and handling one enemy on its own is not the same as fighting continuously in unfamiliar terrain.
Bring poison resistance and the key before you leave
Check that you are carrying finished, fermented poison resistance mead and not the base brew. The Swamp Key gets you into the crypts; food, repairs and a way home decide whether you survive long enough to explore. Crypts, surface resources and poisonous enemies are described on the Swamp page.

Weapons aside, your pickaxe and your transport plan matter just as much. Leave space in your inventory, keep spare supplies at home, and do not sail a boat that one bad collision would destroy. Treat the first expedition as a complete operation, not a wander after stepping off the boat.
Land somewhere you can control
If there is a reasonably safe Meadows or Black Forest nearby, consider building a foothold there and walking into the Swamp from land. If you must land directly, clear the landing spot and set up your way back before you chase any distant loot.

Mark your boat, portals and discovered crypts on the map. Name the icons so you can tell "unexplored", "in progress" and "cleared" apart, or you will repeat the same walk next time. Watch your stamina when crossing water, and never plan a retreat that requires a long swim.
Inside a crypt, secure an exit before you open every door
The muddy scrap piles in Sunken Crypts yield iron scrap and other materials — see Sunken Crypt. Each time you break into a new section, look at the enemies and the space before you keep digging. Opening too many directions at once removes your ability to control how many fights you take.
Note the direction of the exit as you clear, instead of looking for the way out when your inventory is full and your food is running down. Pick up withered bones and other progression materials on the way, but do not fight while overloaded with things you think might be useful later.
Spend the first iron on your most obvious bottleneck
Prioritise tools, your main weapon, defence or building upgrades according to what you actually need, rather than spreading the first batch evenly across everything. If ordinary enemies are a struggle, invest in combat; if fights go fine but you cannot get the ore home, invest in logistics. Finishing one or two clear goals per trip makes it obvious whether the investment worked.
Under the standard portal restrictions, iron needs its own transport plan. Stockpile ore at a staging point, then organise a dedicated voyage home. Do not take on a new high-risk target on the way; getting a loaded ship home matters more than one extra map marker.
When to prepare for Bonemass
Once you can travel to crypts and back reliably, have poison resistance and healing supplies, and own a suitable blunt weapon, start planning the boss. The key opens a biome, not a pass that excuses preparation. The Swamp is only really done when it becomes a place you can return to for resources again and again.
Pack list for a first Swamp trip
| Item | What it solves | Common mistake |
|---|---|---|
| Fermented poison resistance mead | The biome's constant poison pressure | Carrying the mead base instead of the finished drink |
| Swamp Key | Getting into the crypts | Treating the key as a pass that excuses preparation |
| Pickaxe | Muddy scrap piles inside the crypts | Repairing the axe and forgetting the pickaxe |
| Transport plan | Getting iron home under the standard portal restrictions | Sailing a boat one bad collision would destroy |
| Free inventory space | Carrying a load back out | Fighting while overloaded with things that might be useful later |
Food, repairs and a way home are assumed on top of this list — they decide whether you survive long enough to explore.
Sources
The mechanics and numbers in this guide come from the material below. Open the original pages to check them yourself.
- S001 Swamp page valheim.fandom.com Accessed
- S002 Sunken Crypt valheim.fandom.com Accessed
- S003 valheim.wiki valheim.wiki Accessed
Related guides
Valheim Bonemass: Blunt Hits, Poison Resist
Summon Bonemass with ten withered bones, pick a damage type that actually works, handle the poison cloud and adds, then use the Wishbone in the Mountains.
v1.0.12Valheim Mead Guide: Resist and Heal
Brew Valheim mead on the current chain: mead bases and fermenting, poison and frost resistance versus healing, and why your base is not drinkable yet.
v1.0.12Valheim Sailing & Ore Hauling Guide
Valheim sailing from your first real ship: planning routes and landings, handling headwinds, running ore home, and cutting losses when a ship goes down.
v1.0.12
